In how this how to prepare for scuba diving article, we discuss how to ensure your kit is in good safe working condition, so there are no unexpected or unpleasant surprises when you return to diving. Although this article will give you the basics, consult the relevant user manuals for specific maintenance procedures.
How To Prepare For Scuba Diving
Taking the time to clean everything post-dive will increase the life and safety of your equipment. However, with time and use, everything deteriorates. Please don't wait until something breaks before you replace it. To be safe, it's essential to carry out periodic equipment checks.
For fins, masks or anything that has straps or buckles, look for cracks, splits, ruptures and check functionality. If you notice signs of damage or loss of function, replace them. Also, check your mask's seal for mold or fungus, particularly where the glass joins the seal. This area is prone to dirt or grime collecting and can be challenging to clean.
You should check dive suits for damage, tears and holes. Make sure the seams are in good condition. Zippers should be undamaged, move smoothly and regularly lubricated with Zip wax or oil. Seals and cuffs should be without cuts, splits or cracks because they could tear when getting into your suit or result in a leak in the case of a dry suit.
If you dive a drysuit, check the valves and the seals around them for cracks and ensure they are in good working condition. To do this, attach the inflation hose to the valve. You should be able to activate the valve without excessive force, and the gas flow should stop when you release it. Ensure the hose attaches/detaches easily from the valve and keep the O-ring in the coupling lubricated with silicone spray. The pressure release valves should vent adequately, but don't apply silicone spray – it may cause leaking.
When ‘cold water' diving season begins, it is good practice to inflate the suit completely using balls or bottles to block the seals and wait 15-20 minutes to see if it remains fully inflated. This is also the perfect occasion to check the relief valve to see if it works properly.
Similar principles apply to your BCD. We recommend you occasionally fully inflate the BCD until the pressure relief valve activates, then wait 15-20 minutes to see if it stays inflated. If it has metal rings or buckles, they should not show signs of corrosion and check the straps for any wear and tear.
Regulators and hoses need special attention. Thoroughly cleaning your regulator post-dive will prevent most problems, but ensure it works properly. Start by inspecting the hoses. They should be in good condition without damage, cracks, splits, scuffs or blisters. Check braided hoses for loose threads. Squeeze hoses over their entire length to assess flexibility. Any change in resistance while squeezing along the hose could be a sign of a possible problem. Check the hose fittings for scale build-up; the scale can remove this with household vinegar or any citric acid-based descaling agent. Many divers use hose protectors, which can lead to salt, dirt or scale build-up underneath them. Be sure to slide any covers away and clean if needed.
Once hoses are checked, you can examine the second stage. The mouthpiece should not have any cuts, and the bite tabs should be in good condition. Both the exhalation port and mouthpiece should be firmly attached. If present, the breathing resistance control knob should turn easily. It should not be possible to inhale through the second stage unless it is pressurised; if you can draw air through it, there is a problem with the membrane. Once pressurised, try the purge button, but don't assume this means that you can skip a breathing test.
It would be best if you breathed in and out from the regulator a few times to check its working condition. Listen for any leaks or hissing sounds; if you hear anything try to determine the source. It might mean a broken O-ring in one of the connections or fittings. There isn't much more to check on your regulator's first stage than leaks. Before attaching your regulator to the cylinder valve, ensure the O-rings on the regulator and valve are in good condition. Finally, don't forget to check your pressure gauges. Are they reading correctly?
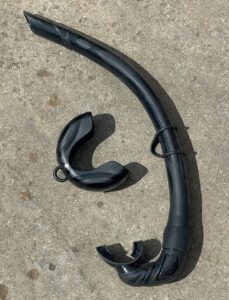
As a diver, you carry other equipment that must be checked periodically, sometimes before the dive. This includes your snorkel (check the mouthpiece and exhalation valve), diver surface marker buoy (DSMB) and other safety kit, knife or line cutter, and ensure that your batteries are charged for electronic equipment.
Do I need to check my gear if I always do a buddy check?
Unfortunately, this is often the only time, if at all, that a diver checks them and their buddy's kit. You can identify problems during a buddy check, but it should not replace the regular maintenance checks described above.
If there's a problem, what should I do?
If you find anything wrong, a broken mouthpiece, ripped seal, leaking regulator or valve, it needs immediate attention and care. We recommend you keep some spares in your dive kit, including a mouthpiece, straps, O-rings, batteries, neoprene glue, silicone spray or grease, and zipper wax. That way, you can do minor maintenance work yourself. Discovering that something is not working properly just before a dive is problematic. It can ruin your dive or, worse, lead you to dive anyway, ignoring the problem, placing you and or your dive buddy at risk.
What more should be done?
Many organisations have equipment speciality courses where you can learn more about diving equipment and how to maintain it properly. Why not consider such a course this winter?
NB: It is recommended that divers take special precautions, including disinfecting their scuba gear when appropriate, to prevent the spread of COVID-19.
You can see more content from Dan Europe from their regular column, or check out the DAN website for more information about medical advice and diver insurance.


