Scuba Diver Editor-in-Chief Mark Evans offers up 10 top tips that will aid budding underwater photographers get those awesome eye-catching shots and learn how to take good underwater pictures and do check 5 Breathing Techniques to be a better Scuba Diver
Remember to subscribe to the Scuba Diver YouTube Channel so you don't miss out on any future videos.
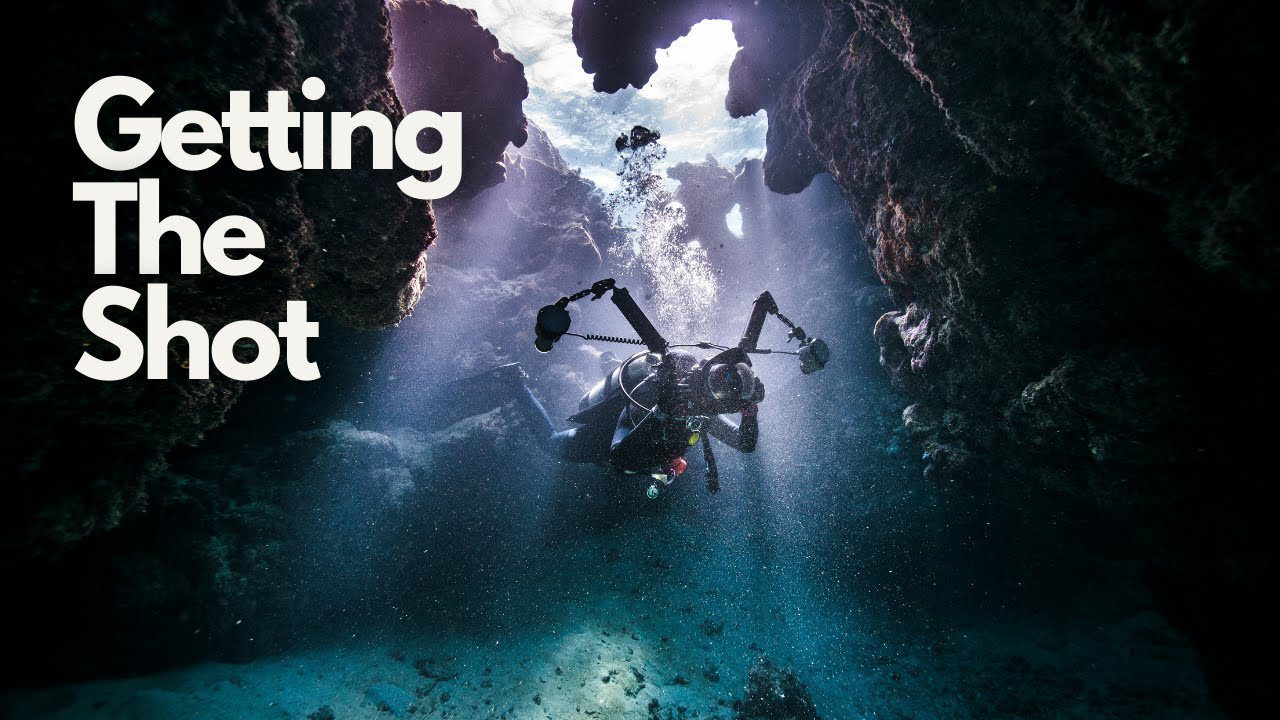
With digital cameras and waterproof housings getting ever more affordable it seems like virtually everyone is turning into an underwater photographer. Now we can’t guarantee that you will be producing award-winning images after watching this video but these 10 basic top tips will certainly help you up your game and set you on the road for getting some cracking photographs.
Tip #1 Nail your buoyancy
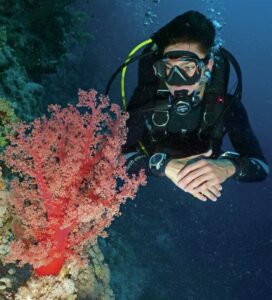
One of the biggest problems with cameras and housings becoming ever cheaper is that even beginners are entering the water with them. Before you even consider trying your hand at underwater photography please get your buoyancy down pat first. There is nothing worse than people ploughing their way through a pristine coral reef chasing a fish for a photograph without a thought for their buoyancy. You want to have your buoyancy control as second nature before adding a camera and housing into the mix. If getting neutral in the water is instinctive then you’ll be able to retain decent buoyancy control while you are attempting to take photographs. And remember no photograph is worth trashing the reef for – if you can’t get in to take a shot without damaging the reef move on in search of another subject.
Tip #2 Get used to your camera
Now this might sound common sense but you’d be amazed how many times I have been asked extremely basic questions about someone’s camera system and on talking to them found out they have only just bought it. As with any piece of diving equipment it is best to get your head around at least the basic functions before heading off underwater. I’d suggest starting with the camera itself first – familiarize yourself with all of the main controls take some test shots around your home and local area and then put it into the housing – and do it all over again. Yes the controls are all in the same place but it is amazing how different it can feel operating a camera through a housing.
If you have access to a pool it is a good idea to go for a dive with your camera and housing in there prior to your first diving holiday. As before you might have used the camera and housing topside but it is a whole different scenario using one actually underwater. It is much better to get to grips with your camera and housing in these situations rather than grappling with the complexities on your first dives of your diving vacation. Not only will you not get any decent shots but you could also end up kicking the living daylights out of the coral and/or your buddy or worse end up in a accident because you are so caught up in trying to wrestle with your camera and housing that you take your eye off the ball when it comes to your basic diving requirements.
Tip #3 Don’t cut corners when getting ready to dive
Although as I said in the introduction digital cameras and housings are coming down in price all the time if you are using a decent mirrorless camera or DSLR then the camera itself is still going to be a pretty penny the lenses are still quite pricey and the housings will be a wedge of cash so you will want them to last. The quickest way to a dead camera is by skimping on your preparation which sooner or later will end up in a flood but I still see people playing Russian roulette by just not taking the proper precautions before each dive. Take great care with each and every O-ring make sure there are no nicks or cuts in them and apply a small amount of silicone grease before you fit them into your housing.
These days with more and more strobes being triggered by fibre-optic cables which don’t have to hard-wire into the camera housing there are fewer and fewer O-rings to contend with so there is no excuse to cut corners. After you have got all of the O-rings in place before you close the housing have a good look at them for any errant hairs or pieces of debris – even a small piece is enough to break the seal and cause a flood. Once your housing is sealed dunk it into water to ensure it has sealed and there are no bubbles coming out of it. If your housing has a vacuum pump make sure you use it. On the flipside I remember being on a trip with an underwater photographer who was seriously OCD about O-rings – he would literally pour over each one for a good 10-15 minutes before fitting them into his housing. I am all for being careful but watch that you don’t go too overboard and become obsessed!
Tip #4 Get a strobe or two
Most cameras have a built-in flash but these are next to useless underwater. One the flash is too small to really light anything underwater and two the flash that it does emit will only light up all the particles in the water and ruin your shot with backscatter (built-in flashes are located too close to your lens). What you want is an external strobe or two. Again like cameras and housings strobes have come down a long way in price.
There are numerous benefits to using external strobes. Being mounted on arms that keep them a decent distance away from your lens with careful positioning you can minimize that dastardly backscatter. Strobes also pump out significantly more powerful flashes so you will be able to better light your subjects. And as they are on articulated arms you can move them wherever you need them for specific shots.
Tip #5 Take a test shot!
I have seen far too many underwater photographers excitedly grab their camera housing off the camera bench and then giant stride off the boat ready to capture some amazing images only to realise once they are on the dive itself that they left their lens cap on! Once my camera and housing have all been fully prepped I do a test shot – including any strobes I have on the system – to make sure that everything is working. It is far better to discover the lens cap is still in place the camera battery is nearly flat or you haven’t got any batteries in your strobes when you are sat in your room and can rectify the issue rather than once you are underwater when all you can do is curse.
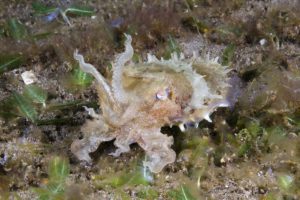
Tip #6 Get close
So you have got your camera all prepared and you are now on the dive ready to start shooting. One of the most sage pieces of advice I received when I started out taking underwater photographs was to get close to my subject. In fact I was told to get close – and then get closer as inevitably when you are starting out what you consider is close is still too far aware. You don’t want to have your subject fish being a tiny spec in the middle of your image do you? But I can zoom in I hear you say.
Well yes you can use zoom on certain cameras or with certain lenses but it is best to keep this to a bare minimum – I have seen people with compact digital cameras zoom in and fill the frame with their subject but they are a good four or five metres away in which case their strobes are not going to be able to properly light the shot. Try to move in slowly and carefully and fill the frame when it is set as wide as possible. I tend to use a 16mm lens when shooting wide-angle and so I am the zoom – and it is amazing how close you really have to be to get a good shot. So just remember the mantra – get close then get closer.
Tip #7 Shoot upwards
The other piece of advice that has always stuck with me is to always shoot upwards or at the very least level with your subject. Sometimes it is impossible to do anything but shoot downwards but it is extremely rare that such shots will come out well. By shooting upwards you will get better lighting and you can often frame the subject against a blue-water background which will make it pop far more than if it is against a cluttered reef scene for example.
Tip #8 Take it slow
Don’t chase after your subject as guaranteed unless it is a nudibranch or something like a frogfish it can swim faster than you. I am constantly amazed at people who insist on shooting off at speed after a turtle – believe me you are not going to catch it and at best will get a shot of its rear end disappearing into the blue. Approach your subject slowly and carefully not being afraid to stop for a while if it appears nervous or skittish.
If you take your time it is possible to get extremely close to some creatures such as turtles stingrays and so on. I always try and approach animals from head on – if they can see you coming they are less likely to swim away whereas if you come at them from behind their survival instincts will kick in and they will be off. This may mean when you spot a potential subject you have to do a wide arc to swim around and get in front of them.
Tip #9 Maintenance is key
While preparing your camera and housing to go diving is vital it is just as important to perform after-dive maintenance as well. Try to dunk your camera in a rinse tank as soon after diving as possible but this will only get rid of some of the saltwater your system has been swimming around in. When you are back to your room leave your housing to soak in lukewarm water for an hour or so and when you first put it in give all of the buttons a press five or six times each to help that freshwater get into all of the nooks and crannies and rinse out any residual saltwater.
If there has been a reasonable length of time between leaving the boat or dive site and getting back to your room – maybe a stop-off for an apres-dive beer or two – then I will leave my housing to soak for a couple more hours to get rid of any dried salt crystals. Once it has had a good soak I give it a quick towel off and then set it on a towel on the floor to fully air dry.
Tip #10 Don’t be afraid to use technology
Some underwater photographers can capture amazing images that look fabulous when taken straight off the camera but by and large most images need a little tweaking once you have downloaded them and there are a multitude of computer programmes out there that you can use to give your photographs a bit of a lift. Just as with your camera and housing you need to get to grips with this software so practice is key. And don’t feel like you are ‘cheating’. I have seen the originals of many an outstanding magazine shot and they don’t look anything alike so everyone does it. If the technology is there why not make use of it?
What are some of your top hints and advice for budding underwater photographers?
Leave your comments below and if you have a question fire away – if we can’t answer it sure some of our ever-growing subscribers will be able to assist.