Beyond ‘Fish ID’
Paul ‘Duxy’ Duxfield gives some sage advice on ways to lift your underwater images above the ‘norm’ and give them a bit more creative impact
This month’s piece is for those people who want to change things up a bit and inject a bit more ‘oomph’ into their shots.
Ok, so now you’re fully conversant with the basics of underwater photography. And let’s say you’ve got the hang of juggling your shutter speeds, apertures, ISOs and flash output, to get the exposure and overall look of the pictures sorted, but what next?
A lot of people get stuck at this juncture, and reach a bit of a plateau with their aquatic imaging escapades. Producing perfectly good pictures but somehow missing that vital element that will elevate their shots into something with more impact than straightforward fish ID shots.
How do I know this? Well, people tell me all the time, on the workshop trips, and I also see the evidence too.
Don’t get me wrong, I have nothing whatsoever against a beautifully exposed and lit fish ID picture. I take lots of them myself truth be told, but whether or not they’re my shots or someone else’s, they rarely give me cause to remember them.
So what practical steps can you take to avoid falling into the ‘Fish ID’ doldrums? I’m also using the term ‘Fish ID’ here slightly loosely, as I’m including all types of underwater photography from wreck pictures to shots of fellow divers that have a slight creative twist to them.
I’m going to look at a selection of pictures that I’ve taken that for one reason or another I feel I have raised the stakes to move my own personal bar a little higher, and I’m going to explain my thoughts and thinking behind the shots.
You may or may not agree, but the important thing is that you start thinking and experimenting more, as coming out of your comfort zone will inevitably result in you learning new tricks over time.
For my first choice I’m actually going to pick a very common type of shot of a very common Red Sea subject and explain what I think makes this a little different from the norm.
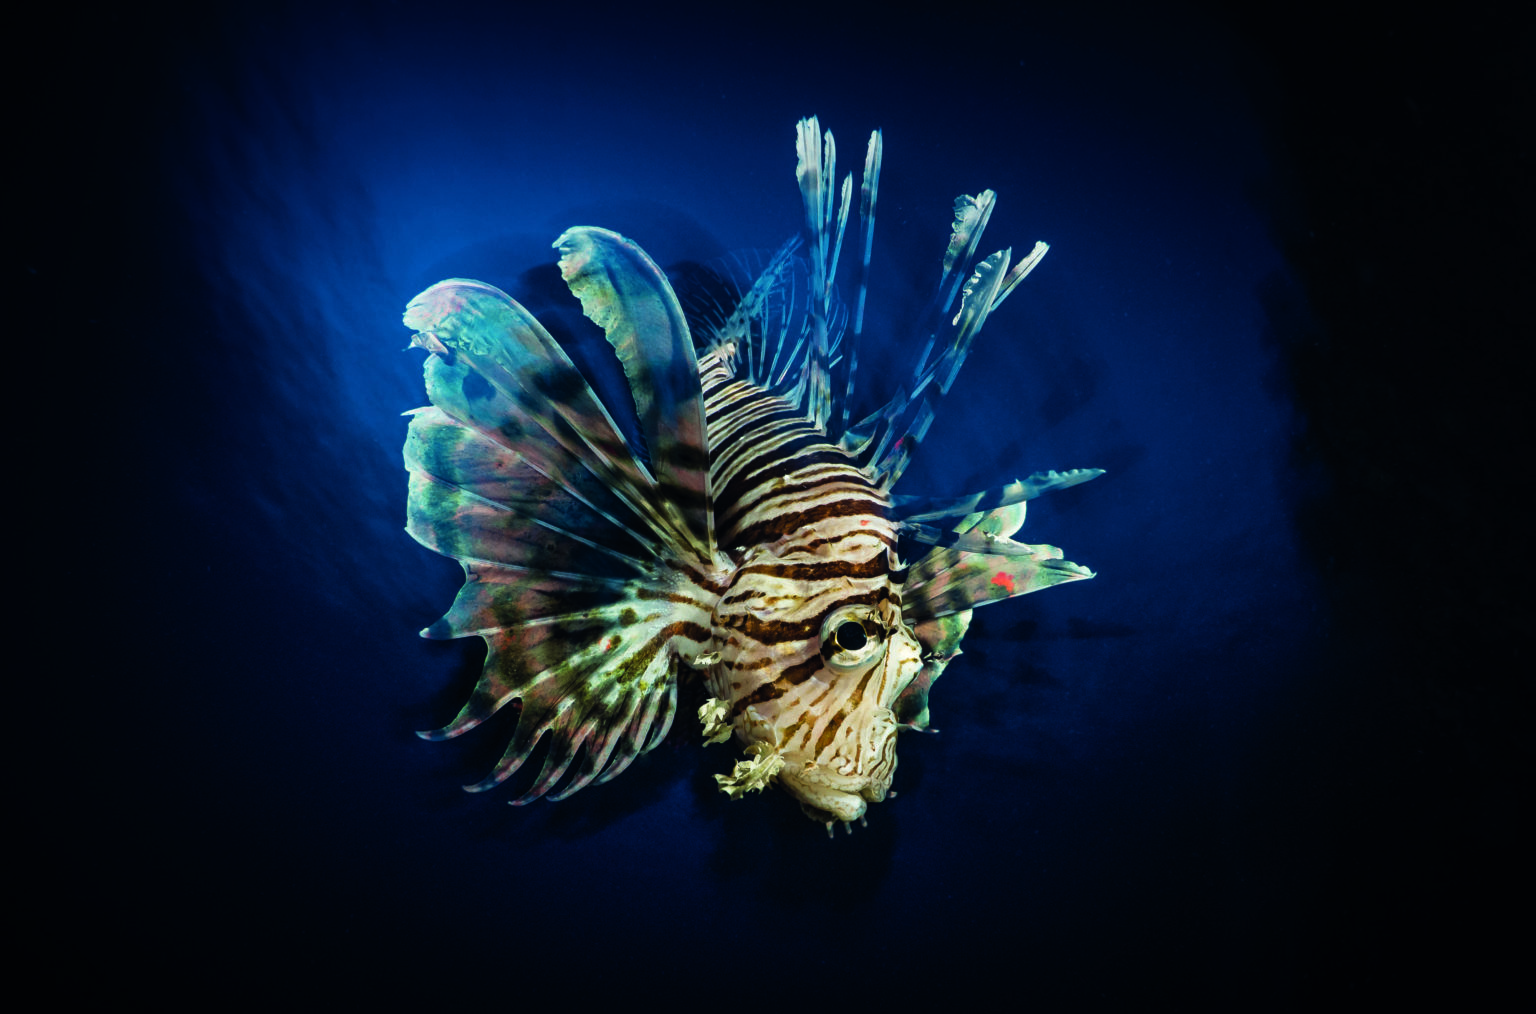
A humble but definitely not dull lionfish. So what was my thinking behind this very simply and centrally framed shot, that could quite easily be deemed to be a fish ID shot?
Setting the scene, I was on one of my favourite dives of the day, at dusk. That lovely time when the blues of the background water are getting deeper and darker minute by minute, but which allows you to start to experiment with your shutter speeds and make them longer in duration. This will mean there will come a point in the dive when the sun has actually set, so getting any sort of background exposure at all, your shutter speeds will be very long.
In this case, I was shooting at around a second duration, and it was still resulting in the background being quite dark in the gloomy crepuscular light. For practical reasons, shooting like this means you can’t place the camera upon a tripod. I needed a hint of background reef and surface, so I was pointing straight up. This long exposure meant the blurred surface and reef was the perfect background, not quite inky blue black, to place my lionfish upon.
Of course, if you’ve dived the Red Sea before you’ll be very aware of how prolific these pretty fish are, so finding your subject shouldn’t be too difficult. In this case the greedy beast had decided to follow me about as my focus light was providing great conditions for it to hunt. Getting it framed, front on, was much easier than it is chasing them around during the day.
You may be wondering why the long exposure hasn’t resulted in the lionfish becoming all blurry? My two strobes placed close to the dome of my fisheye lens either side are providing the main illumination from the front, and strobes provide a very brief burst of light measured in milliseconds, which will freeze anything in the foreground, but if you look around the edges of the fish you’ll see a slight silhouette as the fins of the fish and my movement has resulted in some shadowy blurring, but this just adds to the end result, of a bitingly sharp foreground object against a contrasting soft deep blue background, in my opinion.
The final touch in this case was the eye contact of the fish looking straight down the lens, and placed on the bottom third line for composition. which came about by taking a few pictures to make sure I got the final result I wanted.
Ok, then for our next shot we will revisit the long exposure combined with flash technique, but for a totally different reason and end result.

This picture was taken at the other end of the day from the last shot, and my buddy Adel and I had planned to get up super early to get in the water just before sun up.
Like dusk, this gloomy light can mean one of two things from a technical standpoint, you can either lengthen your shutter speeds or you can increase your ISOs to compensate for the low light.
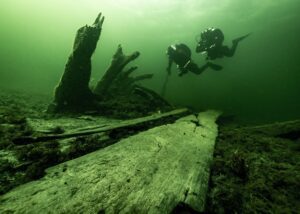
I’d initially planned to use Adel to model around the stern of this famous old girl, to give a bit of scale and context, and we’d tried a few places for him to be, as this is an angle of this wreck that has been shot many times before and I wanted something a bit different from the norm.
Shooting with my fisheye lens I knew that I could get away with longer shutter speeds than normal, down to around a 15th of a second, and still keep myself steady enough not to get any camera shake. And using the fisheye I was very close to the stern rails so I was able to provide a burst of flash enough to give a bit of colour.
What happened next though was totally unplanned and the shot was just my reaction in the circumstances, as we found ourselves surrounded by a big school of fusiliers, swarming over us in an instant and then gone as swiftly as they’d appeared.
Some things you can’t plan for, but the gods of good fortune shone down on us, as I checked the screen and realised that the slow shutter speed, and the brief burst of flash, had delivered this result as the fusiliers were rendered as frozen but with blurred ticks highlighting their motion as the shutter speed stayed open for longer than the flash.

For this shot taken at Jackson Reef in Tiran, I’d a few considerations to think of. The subject was my friend, and dive buddy Bertie Gregory, who has his own show on the Nat Geo Wild channel, about a variety of wildlife topics that he films and presents. So I wanted a shot of him that shows his lively personality and that also had a wee bit of product placement from a number of his sponsors with the kit he wears and uses.
Getting a shot of your buddy is made easier and less distracting if you can place the person against the blue background of the water, and in this case I was shooting straight up the reef, so I had to be mindful of my bubbles not showing in frame, so timing was critical.
As was getting good eye contact from Bertie, it’s helpful if your buddy is aware of what’s going on too and what you’re trying to achieve, so a bit of prior communication is a good idea as well.
I had half a mind that the shot may be used in an advert, so I shot vertically but I covered myself by taking a few alternative framings and angles, which is important.

I mostly shoot wide-angle, but it’s nice for me to occasionally break out the macro lenses for a refreshing change. And this is something that you can do to keep things fresh, so if you find yourself predominantly shooting with one type of lens, then do yourself a creative favour and push yourself to shoot with what you don’t regularly pick, i.e. if you’re a macro shooter then go wide-angle, and if like me you tend to see the wider view, then start looking for the titchy stuff as an alternative.
For this shot of a nudibranch out in Indonesia I used a snoot, which is a device that narrows the beam of your strobe down, in this case to about as wide as a pencil, allowing you to light up only the creature. It’s quite hard work, and needs patience, but allows you to isolate your subject without including a messy background. I also framed it completely head on to increase the drama of this tiny creature making it seem much more dominant, but as I’m shooting macro, only the horns of the slug are in focus, concentrating your attention to its head end, and you can still faintly see its gills way out of focus to the rear of the shot.
Timing was important too, taking the shot as the nudibranch reared up showing some of its underside.

This pinnacle is one of my little secrets in the Northern Red Sea, and is a place I like to visit when I can. It’s very small, is not in the guide books and it will only allow around four divers at a time before it’s overcrowded, so I tend to dive it in shifts with small groups spending around half an hour at a time. It may be small but it’s jam-packed with fish and corals hard and soft, but I wanted a shot that was a little different that showed it whole, like a tiny planet.
So before getting back on the RIB, I shot straight down from the surface, waiting for a diver from the next group to swim into frame to give it some scale and context. I know they say you should try and shoot upwards when you can, but sometimes it’s good to break the rules. It was shot available light without strobes, and with my fisheye lens which gives it the clarity and contrast as I am so very close to the top of the reef, because it nearly comes up all the way to the surface.

Here I wanted to show the early morning beauty of a coral pinnacle in the Red Sea washed over by the sun’s beams. This is all about positioning once you’ve found your pretty coral pinnacle. There are numerous pinnacles you’ll encounter on a typical Red Sea dive, but the best ones for this type of shot are usually around a metre or two from the surface.
Shooting into the sun is often a problem, but the trick to getting beams like this is to only just keep the sun just out of shot, and to underexpose on the background by raising your shutter speeds as high as they will go with your camera, and then adjusting your strobes and aperture to provide a burst of foreground light to balance the scene.
Also get as close as you can with your framing, and if you make a sharp noise, the orange anthias will all dart into the reef in the same direction as you take the picture.
If you’d like to learn how to move your skills beyond Fish ID or simply learn how to get to grips with the basics, why not join me for a future trip, where these skills can be learnt among like-minded people on tailored itineraries that allow you much more flexibility and freedoms than a regular dive trip. I’ve got trips coming to the Red Sea and worldwide, check out my various Social Media pages on Instagram or Facebook – just reach out and I’ll answer.
Duxy Escorted Trips
A great way to learn how to use new kit and develop your skills is on a dedicated trip. My escorted trips are for all and if you have a GoPro or compact, I can improve your skills and realise your full potential in an easy-going, relaxed environment. If you’re a more-experienced shooter, my itineraries and locations are carefully picked to be very photographically productive.
Duxy will be leading a Red Sea liveaboard in 2023 – book now.
Biography
Since returning from Egypt working as a guide in the early noughties, Duxy has been at the forefront of underwater photography technology and how it has changed the way we all now take underwater photographs.
Working as sales manager for the two leading underwater photography
retailers, and more lately as the photography travel specialist for a multi-award-winning dive travel agent, his light-hearted take on the iving world and underwater photography has resulted in him being a regular speaker at the Dive Shows and at clubs up and down the country, sharing his knowledge and experience with all levels and abilities of underwater photographer.
He likes nothing better than to get a beginner started on the route to rewarding pictures, and approaches the subject with an inclusive, rather than exclusive, manner. He now has more than 40 escorted trips under his belt and is continuing to develop new ways to pass on the knowledge and share the love. He can be found on Instagram and Twitter as @takeiteasyduxy and Facebook as Take iT Easy.
Photographs by Paul Duxfield