Martyn Guess provides some insight into and tips on super macro photography
Macro photography is defined as close-up photography of subjects that shows them at lifesize or greater. Subjects underwater typically can range from, for example, an octopus to, say, a seahorse. Super macro photography is where the subjects are typically very small and where they are shown at greater than 2:1, or twice lifesize.
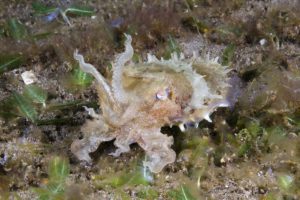
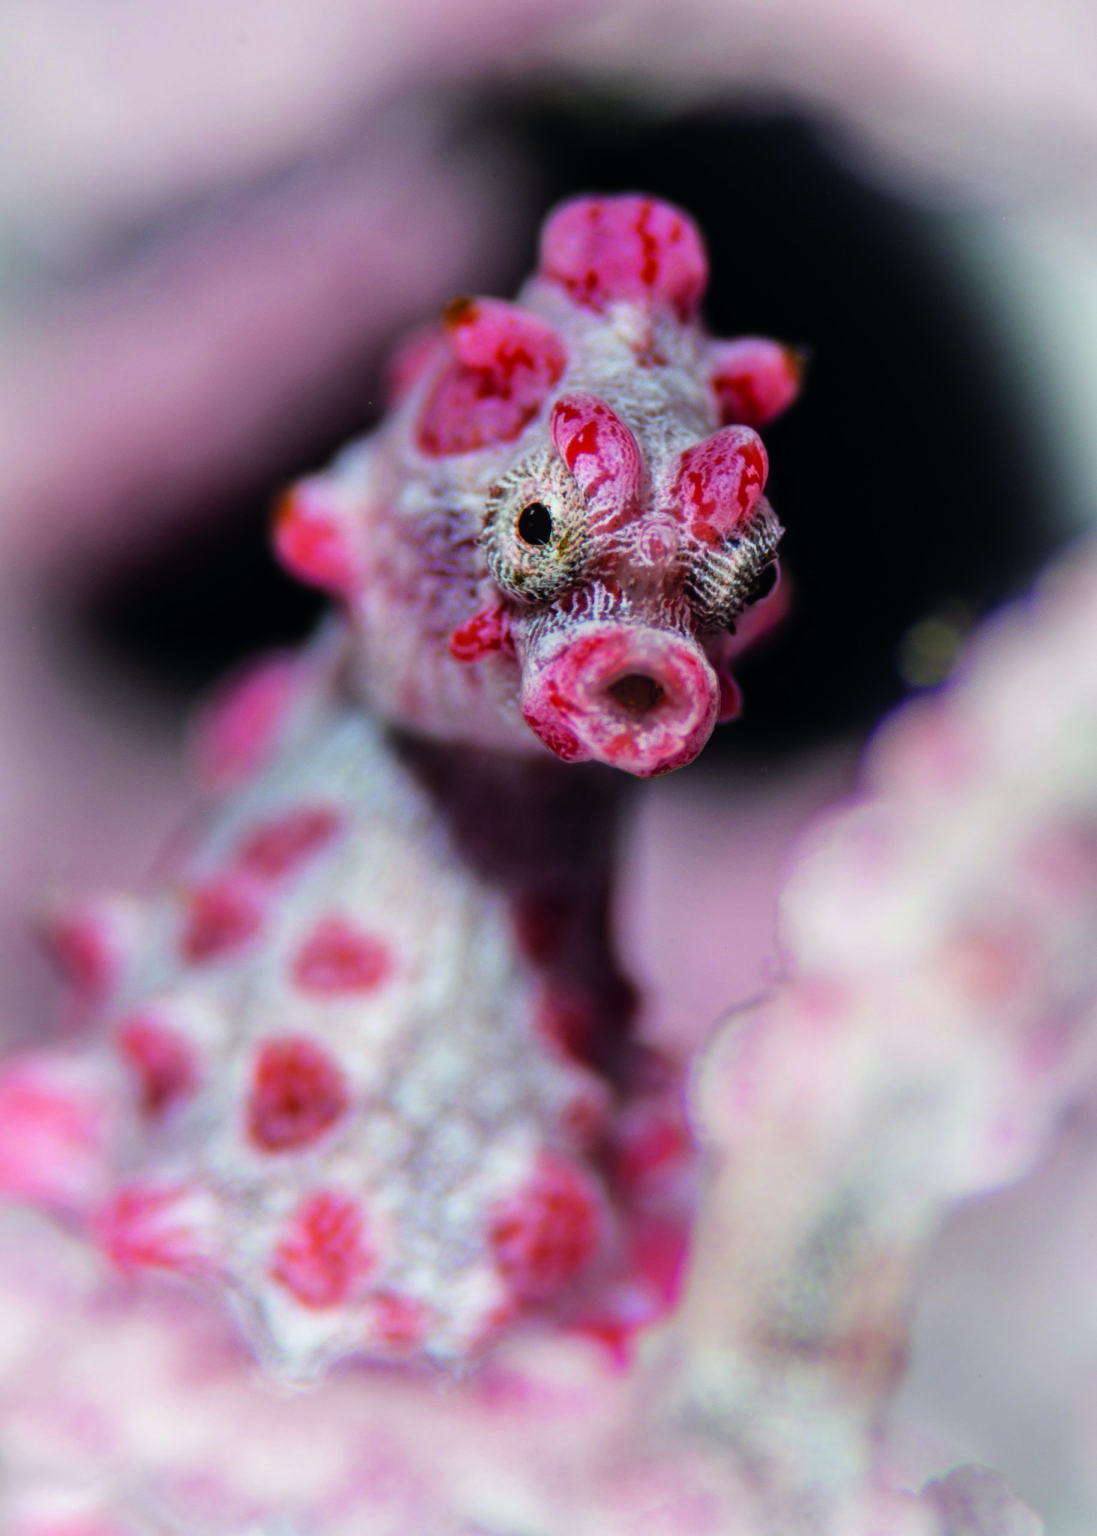
This type of macro photography opens up a whole new range of tiny subjects such as, for example , a pygmy seahorse to tiny frogfish


or hairy shrimp, or nudibranchs like Shaun the Sheep

It also enables slightly larger subjects to be shown filling the frame – for example, harlequin shrimp or emperor shrimp

Super macro has become increasingly popular as more really tiny creatures have been discovered, and also as modern camera’s capabilities to take decent images of these minute subjects with improved autofocus systems has moved forward.
Arsenal of photography Tools
To take super macro images you need to add some accessories to your arsenal of photography tools. Typically, wet magnifiers or diopters which screw onto the housing port and can be taken off and put on underwater – these offer the most flexibility during a dive.
Unfortunately, these can be quite expensive but in my view are worth the investment. I use wet lenses manufactured by Nauticam such as the SMC 1 and more-powerful SMC 2 with a Nikon 105 or Canon 100mm Macro lens on a full-frame camera.
Nauticam also produce the excellent CMC 1 and CMC 2 which work extremely well with cropped sensor cameras and mirrorless cameras and where the go-to lens is around 50-60mm for Cropped sensor and 45 or 60mm with Mirrorless.
These latter wet lenses also work well with compact camera systems. Other manufactures include Saga, Subsea and Inon. What essentially these pieces of glass do is enable the photographer to get closer to the subject and thus fill up more of the frame.
The more expensive the wet lens, the better the optics tend to be. Cheaper alternatives tend to provide images which are softer towards the edges and can exhibit issues with chromatic aberration.
Cheaper alternatives to wet lenses are dry diopters, which you have to fit to the camera lens or extension tubes (get the versions with auto-focus capability). These give the same magnification as wet lenses and provide very good image quality, but the major downside is you are fixed with the magnification they provide for the whole dive.
Great if you are repeat diving on the same site and know the subjects you are going to shoot, but a real hinderance sometimes otherwise, as you will undoubtedly find you are too tight for bigger subjects. You will also need extension rings for your port, which adds to the cost if you don’t have them already.
The other option is to fit a teleconverter between the camera and the lens. The Camera/Lens Manufacture produced teleconverters tend to work the best but other manufacturers such as Kenko also produce excellent and cheaper teleconverters. It is important in each case that you check which lenses they will work with.
I use those produced by Nikon and work with my Nikon 105mm Macro lens and also my Sigma 150mm Macro lens and find these produce excellent results. Again, the downside is you are fixed for the dive, but they can also be used in conjunction with wet lenses for extra magnification.
Perfect if you know you are diving to photograph tiny subjects. The main point of difference between teleconverters and wet lenses or dry diopters is that the TC gives the lens in front of it more power without having to get closer, so are great for shyer subjects or where you can’t get physically really close.
Depth of Field (DOF)
One of the main considerations in super macro photography is that the depth of field can be absolutely minute – literally wafer thin. This has to be taken into account and your technique of taking macro pictures has to be absolutely spot on.
This is where ‘practice makes perfect’ comes into its own! I often advise students to set the camera up for macro with say a higher shutter speed to help with camera shake, and to freeze the action.
Also, so that the camera can gain focus slightly quicker before the shutter is depressed, back button or thumb focus which a lot of the newer cameras can provide. I also use a good focus light to help the auto focus and so that your eyes can focus more easily on the subject and establish where you want the lens to focus – such as eyes or rhinopores.
Having a shallow depth of field however does have many benefits, including a beautiful bokeh or blurred background, which is perfect for setting off the subject in the foreground. Also useful to disguise a complicated or distracting background.
My recommendation to photographers seeking to try super macro is to first use a slightly less powerful wet lens or diopter. The CMC1 or Subsea +5, for example. I remember putting on a +10 wet lens when I first started with this technique and couldn’t see anything through the lens at all!
This was down to the fact that I simply wasn’t close enough! Eventually you get used to roughly how close you need to be. It might seem very difficult at first but with practice it becomes second nature and when you start getting great results, you won’t want to go back. Just make sure that you don’t get so close to the subject that you bump into it!
When you or your guide find a suitable subject, first assess how easy it will be to get into a position to take a shot. One of the first things I teach in underwater macro photography is critter selection. Sometimes it is simply best to just move on and find something in a better position.
It is important that you are comfortable and able to get into a steady position with something like a rock nearby place to hold onto. A current or surge is going to make life very difficult, so best avoided until you get competent with focusing.
Be aware of the surrounding habitat, and don’t simply plonk yourself on the bottom where damage potentially can be done. Good buoyancy is essential.
When you look through the viewfinder or into the LCD, you will probably see nothing initially, as the subject will be completely out of focus. A subject with a good contrast with its surroundings is easier to start with as the autofocus will work slightly easier.
Sometimes as you move in closer the lens autofocus will hunt. When this happens, I sometimes focus on something close by with roughly the same camera to subject distance and then without refocusing simply rock in and out with the subject in the frame until it comes into focus. You can then refocus with the camera autofocus.
When you initially look at the subject decide the part that you want really sharp. It might be a feature such as an eye. Move the focus point manually over the point you want sharp.
As I mentioned above the Depth of Field (DOF) with magnifiers or tele-converters attached becomes very shallow. The DOF will thus create blurred areas behind and in front of the feature you want sharp and if this blur is used creatively the image will stand out.

Certain types of subjects are more difficult when shooting face on. Long-nosed fish or shrimps with legs and claws out in front are an example. You have to decide what is more important and in almost all cases the eyes have to be pin sharp so that the subject engages with the viewer.
With these types of subjects, you just have to accept that say the mouth or the claws will be soft. If an image of the subject won’t work with such features slightly out of focus, the best thing to do is to take the picture sideways on and keep the length of the subject in the focal plane.
Getting to know the focal plane is important in this type of photography. I constantly review my images in the LCD and zoom in and move around the frame to check focus.
Typically, aperture settings should be around the F22 mark and higher in order to counter the shallow DOF created with Magnifiers, etc. I like to have my ISO fairly low to ensure that any digital noise is reduced to the minimum and as much detail as possible is squeezed out of the camera. I tend to use ISO 100/200 but often go lower still.
The converse of this of course is that it is relatively easy to amplify the bokeh effect by using lower apertures and get really dreamy images. There are many subjects which create dreamy images work very well when you open up the aperture.

On your next trip try and borrow a wet lens and try super macro for yourself. You won’t be disappointed!
MY ESCORTED TRIPS
Want to learn how to take or improve your underwater images? Why not come on a photo specific trip? These trips are meticulously planned to the best destinations at the best time of year where the conditions should be perfect for building a portfolio of great images.
The workshops, which are for all levels of experience but mainly aimed at people with a few trips under their belts, include classroom sessions and presentations as well as in water help and guidance, all done in a relaxed and non-competitive friendly environment.
Please contact the Scubatravel team for details of upcoming workshops.
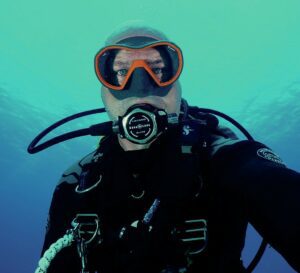
BIOGRAPHY – MARTYN GUESS
Martyn has been diving for over 30 years and taking underwater images for over 25 years.
He has been very successful in National and International competitions and regularly makes presentations to Camera and Photography clubs and Diving shows as well as The British Society of Underwater Photographers (BSOUP) and other underwater photography groups.
Today he shares his passion and knowledge – As well as teaching underwater photography courses he leads overseas workshop trips for Scuba Travel.