Nicolas and Lena Remy go Hunting the Black Angler for that elusive perfect photograph

Introduction to Anglerfish
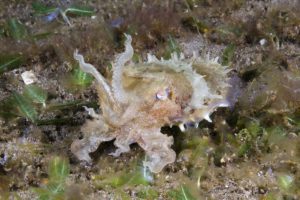
Who wouldn’t enjoy spotting an anglerfish during a dive (or frogfish, as they are called outside Australia)?
They can « walk » on the seafloor using hand-shaped pectoral fins, they agitate a cute lure to attract their prey, and their facial expression resembles an upset emoji: no wonder they sit high on many divers’ bucket list. “Anglers” are also well camouflaged ambushed predators, which makes finding one very rewarding.
Lena and myself like to portrait charismatic, peculiar underwater critters, and whilst we are thrilled to see any type of anglers, we had been hoping to see a black anglerfish (black frogfish) for a while. After all, these are even rarer and their dark robe certainly evokes a strong personality, which we were keen to try & capture on camera.
Discussing our plan with fellow underwater photographers, some being pretty experienced, it struck me that all of them had given up on photographing black anglerfish. They just didn’t get pleasing results and thought these were too much hassle for little reward.
Soooo… we were onto a photographic challenge, but first things first, we needed to find a black angler.

Finding the black anglerfish
Interestingly, black anglerfish isn’t a species per se: several species of anglerfish can be found wearing black, such as the painted anglerfish or the sought-after striate anglerfish (a.k.a. hairy frogfish). What’s more: they can change colors during their lifetime, in a matter of weeks or days, to adapt to their immediate environment.
This might be why we don’t see that many black anglers in Sydney, I reckon black doesn’t blend well into white sand or bright sponges. Over a two years period, we have been aware of five black anglers across Sydney.
Lastly, they aren’t exactly black: those we have seen were dark, reddish brown in color.

Scanning the « anglerfish playground »
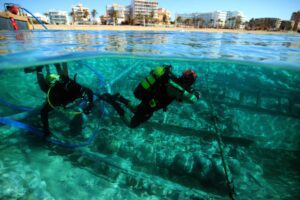
Back to our quest for black anglers, we spent quite some time in Clifton Gardens, Sydney’s best muck dive, where anglerfish are frequently spotted. Over two years, we saw three distinct individuals wearing a black robe, which we all managed to spot by ourselves. Well, a curious octopus helped us once by spooking the first one. another time the angler was taking a stroll along the jetty, « walking » the seafloor in front of us.

Help from the community
In Sydney, we are blessed with a very active and helpful online community, where thousands of divers exchange observations on visibility and report on wildlife observations. This helped us to keep track of the Clifton Gardens anglers which we knew about, know whether they were still around and whether they had moved, hereby increasing our chances to see them again.
Even better, browsing Facebook for fellow divers’ photographs, we learned that another black angler was consistently spotted off Kurnell (south Sydney), and this little beauty was a poser, more often than not sitting high onto some tubular purple sponges. A friend of ours took us to the last location where « blackie » had been seen, and over the next few weeks we were able to spot it around the same area, although it did change position every few days. The key was knowing this individual only sat on the same species of sponges. Somehow the black & purple association must have served him/her well!

Finding YOUR black anglerfish
Our last year was the best: over an 8-9 months period, we have been able to locate and visit a total of 3 black anglerfish. You can find a « blackie » in other parts of the world, but my point is they are rare and hard to find, so do your research ahead of time if you are travelling, and ideally, get a local dive guide who knows where to go.
Once you find a black anglerfish (a.k.a black frogfish), let the photographic challenge begin!

Photography technique
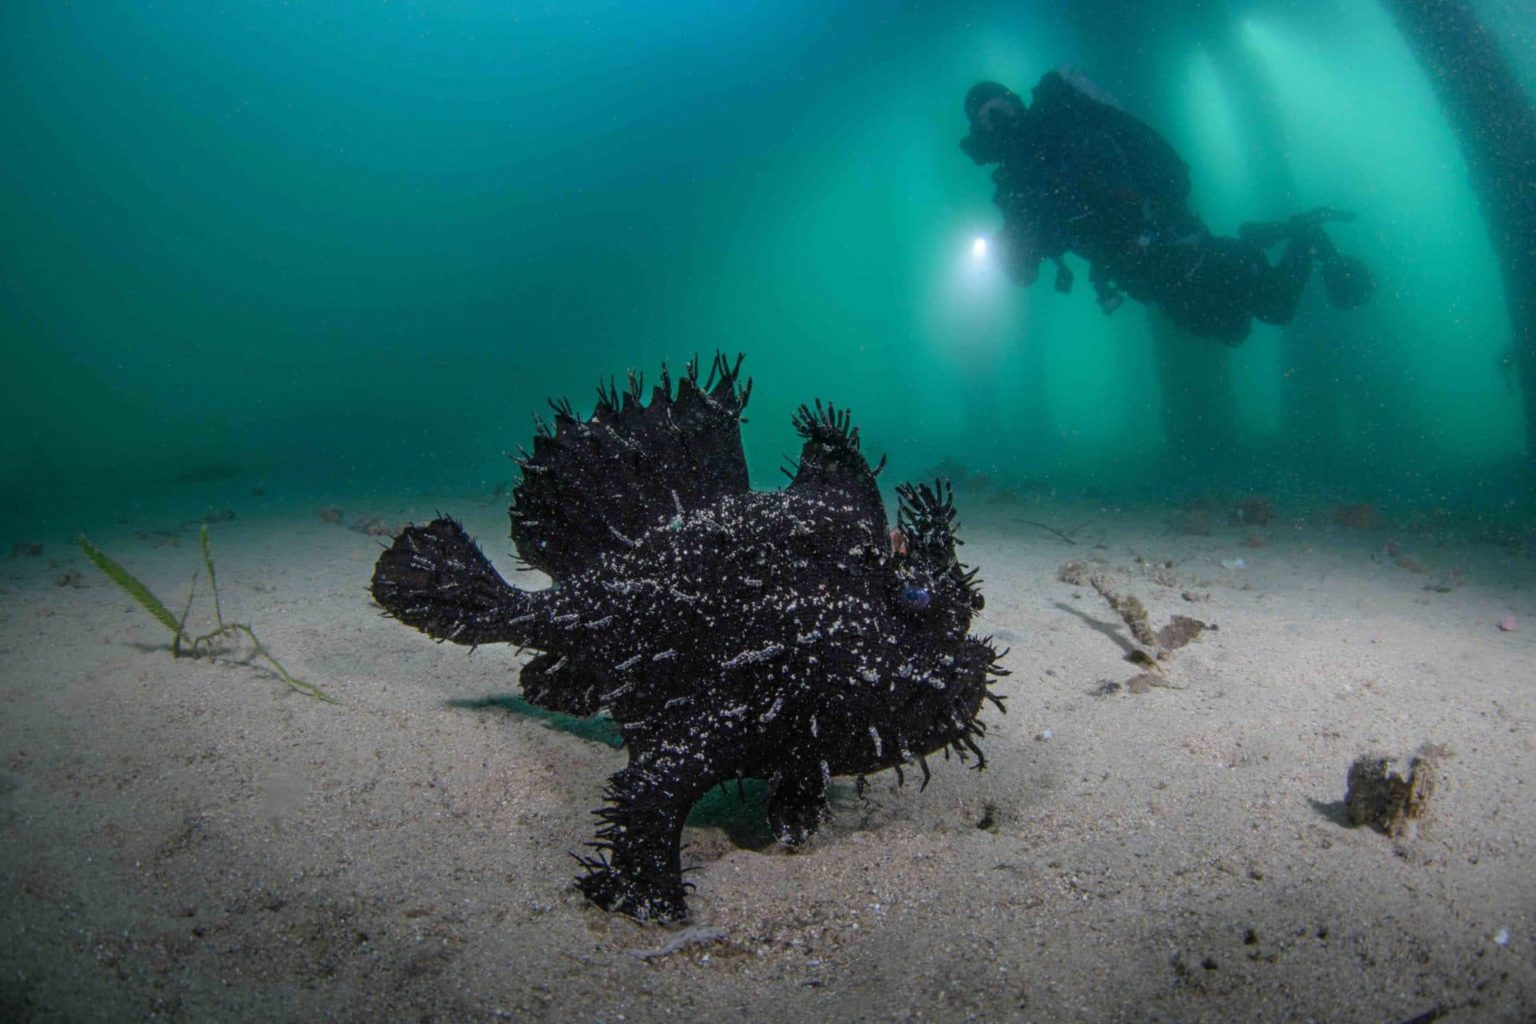
Why are they difficult to photograph?
So why are black anglerfish considered very difficult to shoot? Essentially, they tend to be much darker than their immediate surroundings, meaning the scene which you are trying to photograph is very contrasted, which poses issues both with strobe positioning/aiming, and with your camera sensor’s ability to record details in both shadows and highlights (this is called “dynamic range”):
- If you configure your camera and strobes so that the anglerfish is nicely illuminated, the surroundings will be too bright, and you risk having backscatter ruining your photo, as you are throwing so much light into the frame.
- If you adjust your setup for the surroundings to be pleasantly lit, and the sand not over-exposed, then the fish will appear pitch-black.
In the following paragraphs, I will share advice and techniques to work around these problems, and win your fight against high contrast!
Using a snoot
You will not need much artificial light (if at all) to expose the immediate environment of the black angler, but you will definitely need a strobe to brighten up the dark animal. The most effective way to solve the contrast issue is to use a snoot: these cone-shaped devices are mounted onto strobes, to narrow down significantly their light beam.
With a tighter light beam, it becomes easier to control the spread of artificial light, and illuminate only the anglerfish, without illuminating the surrounding sand, sponges, coral. This way, you can effectively brighten-up the anglerfish without introducing highlights elsewhere.
If your composition feels a bit gloomy, e.g. if the surrounding scene would benefit from a bit more color, you can certainly use a second strobe (this one without a snoot) to « color-paint » these surroundings. You need that second strobe to be tuned-down compared to the snooted strobe, as your aim is to reduce contrast, not to maintain it.

Without a snoot
If you don’t have a snoot, your alternative will be to position regular strobes as close as possible to the anglerfish, and as far as possible from the brighter environment. Think of a black angler sitting on the sand (your worst nightmare): you would position your two strobes in « 2 o’clock / 10 o’clock » positions (imagine a clock, the strobe are above the subject, not on its sides).
Effectively, your strobes are much closer to blackie than they are to the sandy bottom. For instance, they might be 10cm away from the fish, and 20cm from the sand. This doesn’t seem like « much », but the sand will effectively receive 4 times less light than the anglerfish (if you do the Maths, the light received by a surface a square function of the distance from the light-source).
Pick the right location & condition
Be it with a snoot or not, your light source will be close to the subject, which makes it difficult to avoid backscatter, when the visibility is poor.
Early 2020, there were two black anglerfish living on the same muck diving spot (Clifton Gardens, north Sydney), but they were found on two different sand patches. One was in the shallows, 3 meters deep, on a spot where sand was rather coarse, and would quickly settle down after being disturbed (kicking diver, photographer’s hand, etc). The second one lived near a small wreck at 12 meters depth, it was less visited by divers BUT, its immediate environment was very silty, and thin particulates would stay in suspension for ages, after being stirred up. Without a doubt, the shallow angler was much more photography-friendly.

Pre-planning and careful approach
Whilst the poser I mentioned earlier was very static, others did move around the bottom. To minimize disruption to the animal and record a more natural portrait, adjust your lighting and prepare your shot from a distance, before approaching the back angler and starting to shoot. I would typically adjust the positioning of my snoot before, by aiming onto a rock, or just the sand, making sure the light beam strikes where I want it to, and only then move closer to take a few photos of the anglerfish, then back off.
Review on the camera’s screen
More than ever, carefully reviewing your shots on the LCD screen is key: remember we’re trying to deal with a highly contrasted scene, more contrasted than your camera’s LCD is able to properly display. To find out whether you succeeded at recording details in the shadows (in other words, blackie isn’t pitch-black) whilst not over-exposing the highlights, your need to check the photo’s histogram.
At home, digital post-processing
This is the « final hit » to win your battle against contrast. Because you have made sure your photo recorded details both in the shadows and highlights (you checked your histogram during the dive), there are data for your editing software to manipulate. Reveal sufficient details onto the fish, by brightening up the shadows/blacks sliders, and take care of any distractive hot spot with the highlights/whites sliders. Then, proceed with the standard editing which you would do on any of your underwater photos.
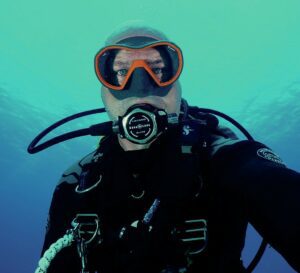
Article Written By Nicolas Remy
Photo Credit: Nicolas Remy & Lena Remy
For more images from Nicolas and Lena visit their Website, Nicolas & Lena Remy Photography or follow them on Instagram and Facebook @nicolaslenaremy